I’ve been building websites for a long time. I remember learning HTML and Microsoft FrontPage as my first website builder. It was such a fun time to be creating horrific looking websites back in the early 2000s. As the internet progressed so did my skills and back in 2016 I formed my company 45Squared to build websites for small businesses. My whole goal is to be your trusted resource when it comes to being online.
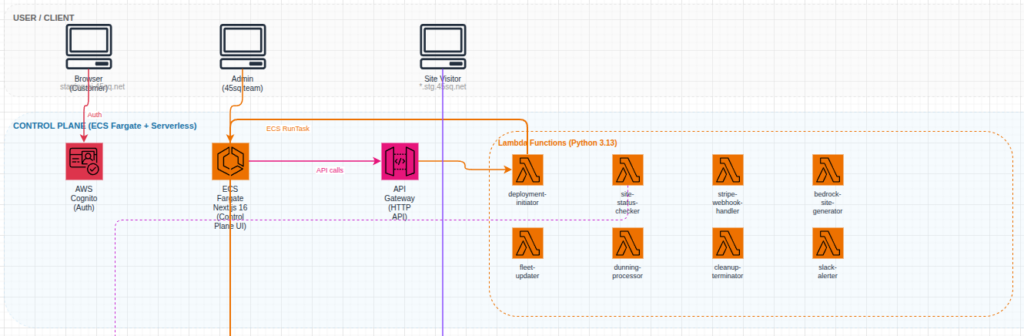
When I started the company I built WordPress websites of various shapes and sizes but they always ran on AWS. This helped me expand my AWS skills as well as provide robust infrastructure for my client’s websites to live on. I managed the website and the underlying infrastructure for a small monthly cost that beat the competition. The result, a bunch of paying customers a decent side hustle.
As time went on, selling became harder and the race to zero for cost was apparent. So, as the AI boom is on, I decided that it was time to automate the site building process.
I started documenting out how I would want this to work. Fully automated website deployments, design, content, custom domains, good SEO base and deployed FAST!
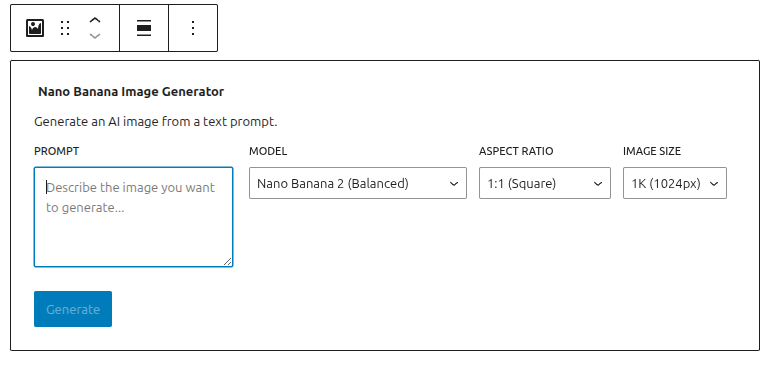
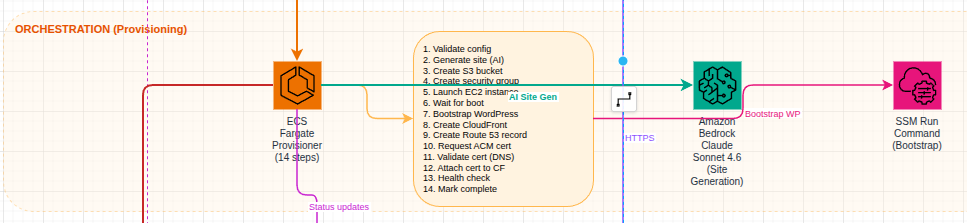
Enter https://ai.45sq.net. This platform is fully automated. The customer can provide inputs and descriptions of what they want as well as photos or other graphical content. The workflow takes all of the inputs and builds a fully functional WordPress website hosted on AWS. The user can easily point their own domain to the server and setup automatic payments. They then get full administrative access to their website so they can expand and add features just like any other WordPress site.
So why did I build this?
If you contact a web designer now you will have to pay them to build up the initial design, work with their timelines, end up with something that needs revisions and your time to live will be in the weeks not minutes.
The platform I built for 45Squared eliminates the need for the initial design fees and focuses on getting you online quickly. Its great for small businesses who are just getting started.
So now when I get a request to build a site I can tell the customer that I have two options. First, fully custom. I’m still willing to sit with you and build out the picture perfect website. Or, two, you can launch your own and I will still support the website and help you with your online presence.
So that’s it. An easy to use WordPress website launcher. Running on enterprise grade cloud. With content, design, layout and all the rest handled by the magic of Claude Opus.
Try it out: https://ai.45sq.net. No contracts. No weird fees. Get online today.