We lost again. AI is 0-2.
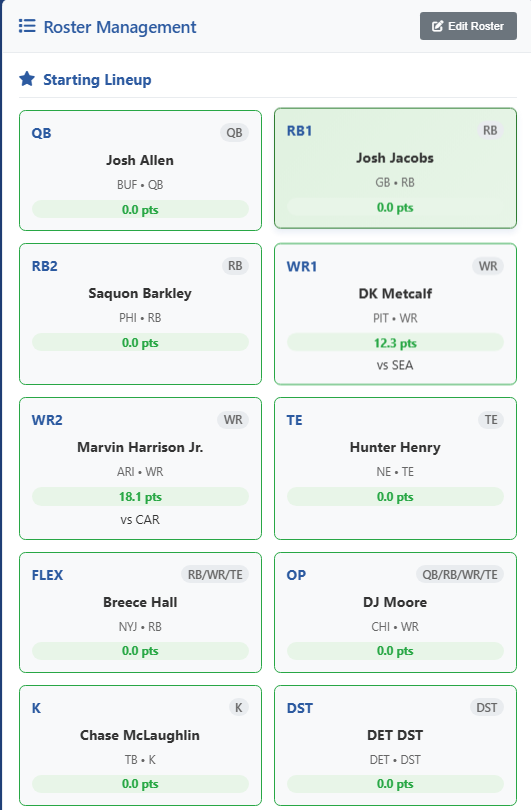
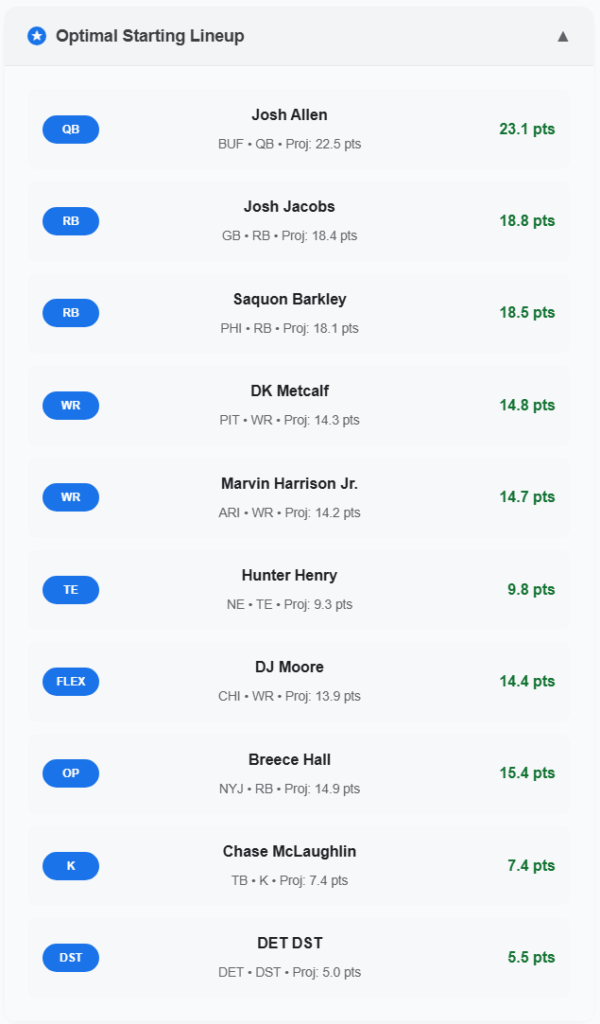
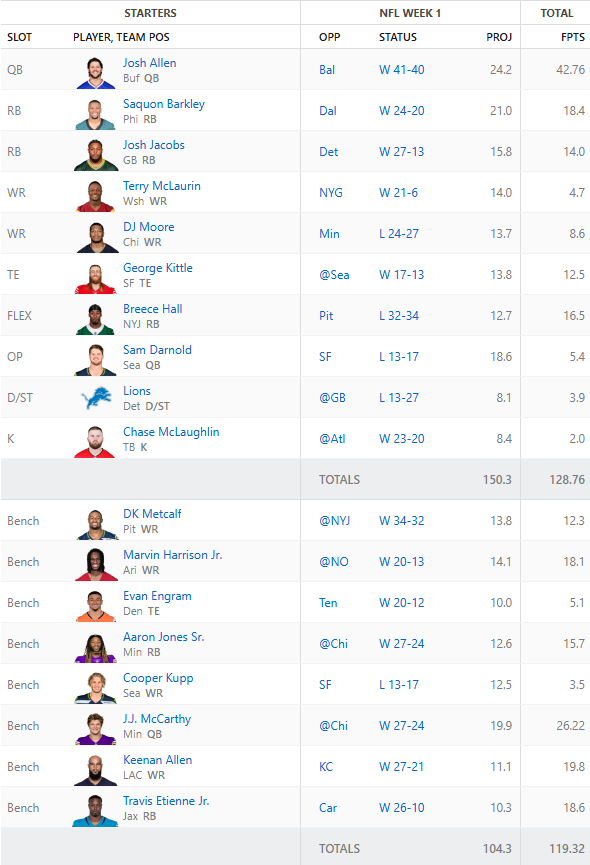
For the most part I agreed with the picks that AI made last week. Except for one. The tight end. It felt a little weird picking Hunter Henry up off waiver wire and boy did I found out why. More on that later. Here are the results from the week:
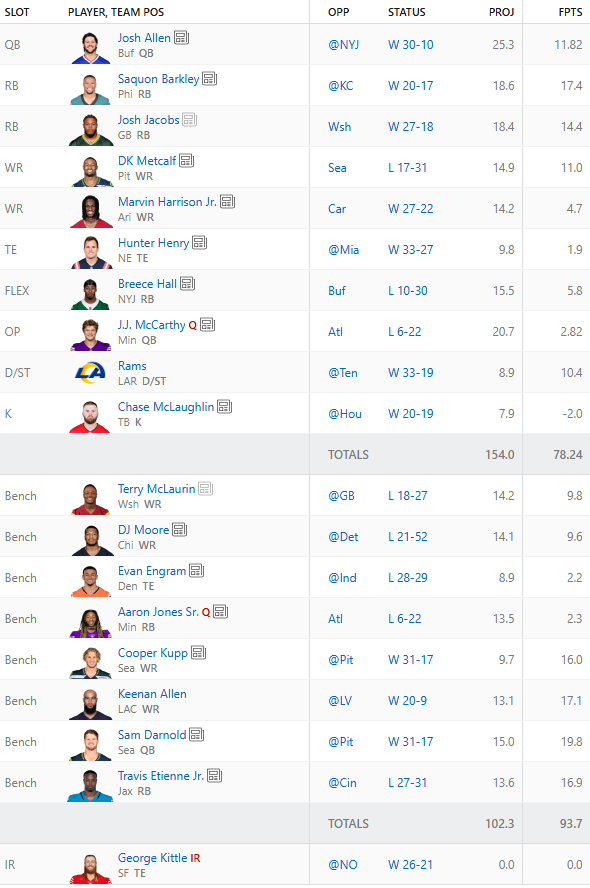
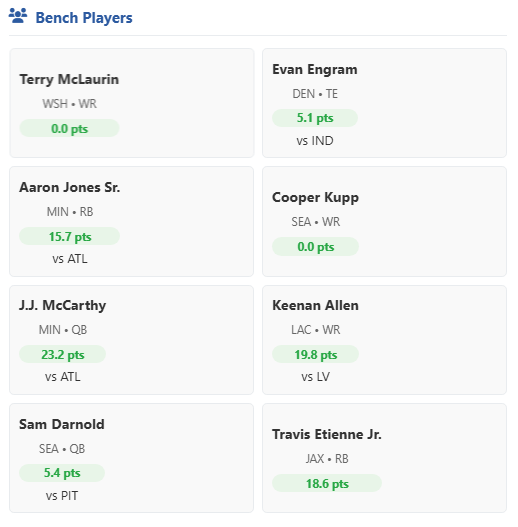
There are definitely some misses on wide receiver but that is always such a hit or miss position. What shocked me the most was Josh Allen only get 11 points. Also, J.J. McCarthy was injured in his game. Not a single player hit their projection except for the Rams’ defense. If we take a look at the bench there are definitely some better picks we could have made strictly from looking at points for the game. However, even if we had selected all the better preforming players the team would have still lost as our opponent had 164 points this week.
Anyway, that’s enough football for this post. Let’s talk about some tech. I mentioned earlier that I was questioning the waiver acquisition of Hunter Henry and I wish I had done some more debugging as to why that pick was selected.
I added a chat feature to the overall application so that we can identify waiver picks and other things faster rather than having to get a full weekly analysis every time. In that code there is a function that generates a recommendation score. I’ll admit, I vibe coded some of this with some prompting of how this should be determined.
# Penalty for high ownership
#ownership_penalty = float(waiver_player['percent_owned']) / 10 # Convert to float
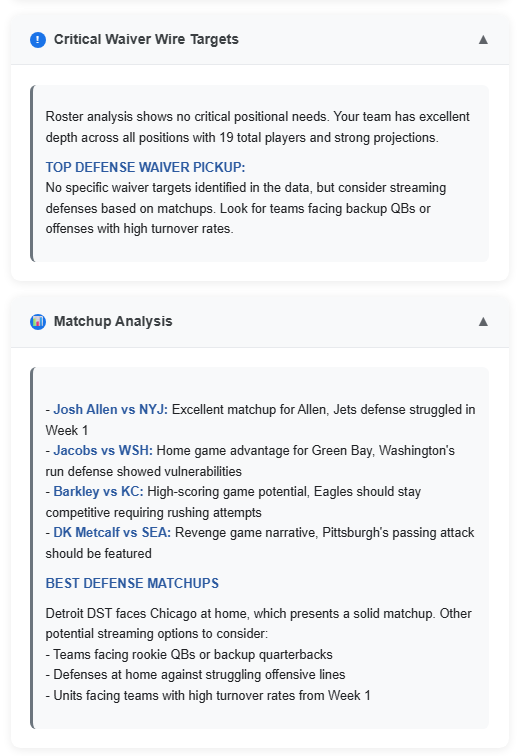
#score -= ownership_penaltyYou can see here that we lowing our recommendation score because of “high ownership” this is because the reverse engineered ESPN Fantasy API doesn’t identify if a player is on a teams roster or not when I pull the players. So a player with a 100% ownership would likely never be recommended. So a player like Zach Ertz, who had 18 points this week was not suggested as he had approximately 80% ownership across ALL of ESPN’s fantasy platform. Well… this problem has been fixed.
Anyway, I also added chat. And I programmed it to respond only as Dan Campbell. Here is some output when I asked “What do you think of my team?”
pounds table
Well I'll be damned, you got yourself a HELL of a roster there, chief! This team's got some serious bite to it - let me break it down for ya.
Your Strengths - These are STUDS:
- Josh Allen - That's your franchise quarterback right there. Guy's a warrior and puts up points like it's going out of style
- Saquon Barkley & Josh Jacobs - Holy smokes, that's a one-two punch at RB that'll knock people's teeth out! Both these guys are workhorses
- Breece Hall in the FLEX - Are you kidding me?! Most teams would KILL to have Hall as their RB1, and you got him as a flex play. That's championship-level depth
- DK Metcalf - Big body receiver who can take the top off any defense
- Your bench depth - Terry McLaurin, DJ Moore, Cooper Kupp, Keenan Allen?! That's four WR1/WR2 caliber guys just sitting there!
Areas that need some attention:
- George Kittle on IR - That hurts, but Hunter Henry's a solid fill-in for now
- J.J. McCarthy at OP - Kid's got potential but he's still unproven. Might want to consider streaming that spot based on matchups
- Marvin Harrison Jr. - Rookie receivers can be boom-or-bust, but the talent's there
The Bottom Line:
This roster is LOADED, especially at RB and WR. You've got championship potential written all over it. The depth is ridiculous - you could probably trade some of that bench talent for upgrades at TE or find a more consistent OP play.
You're sitting pretty, but don't get comfortable! Keep grinding, keep looking for those edges. That's how you win championships!
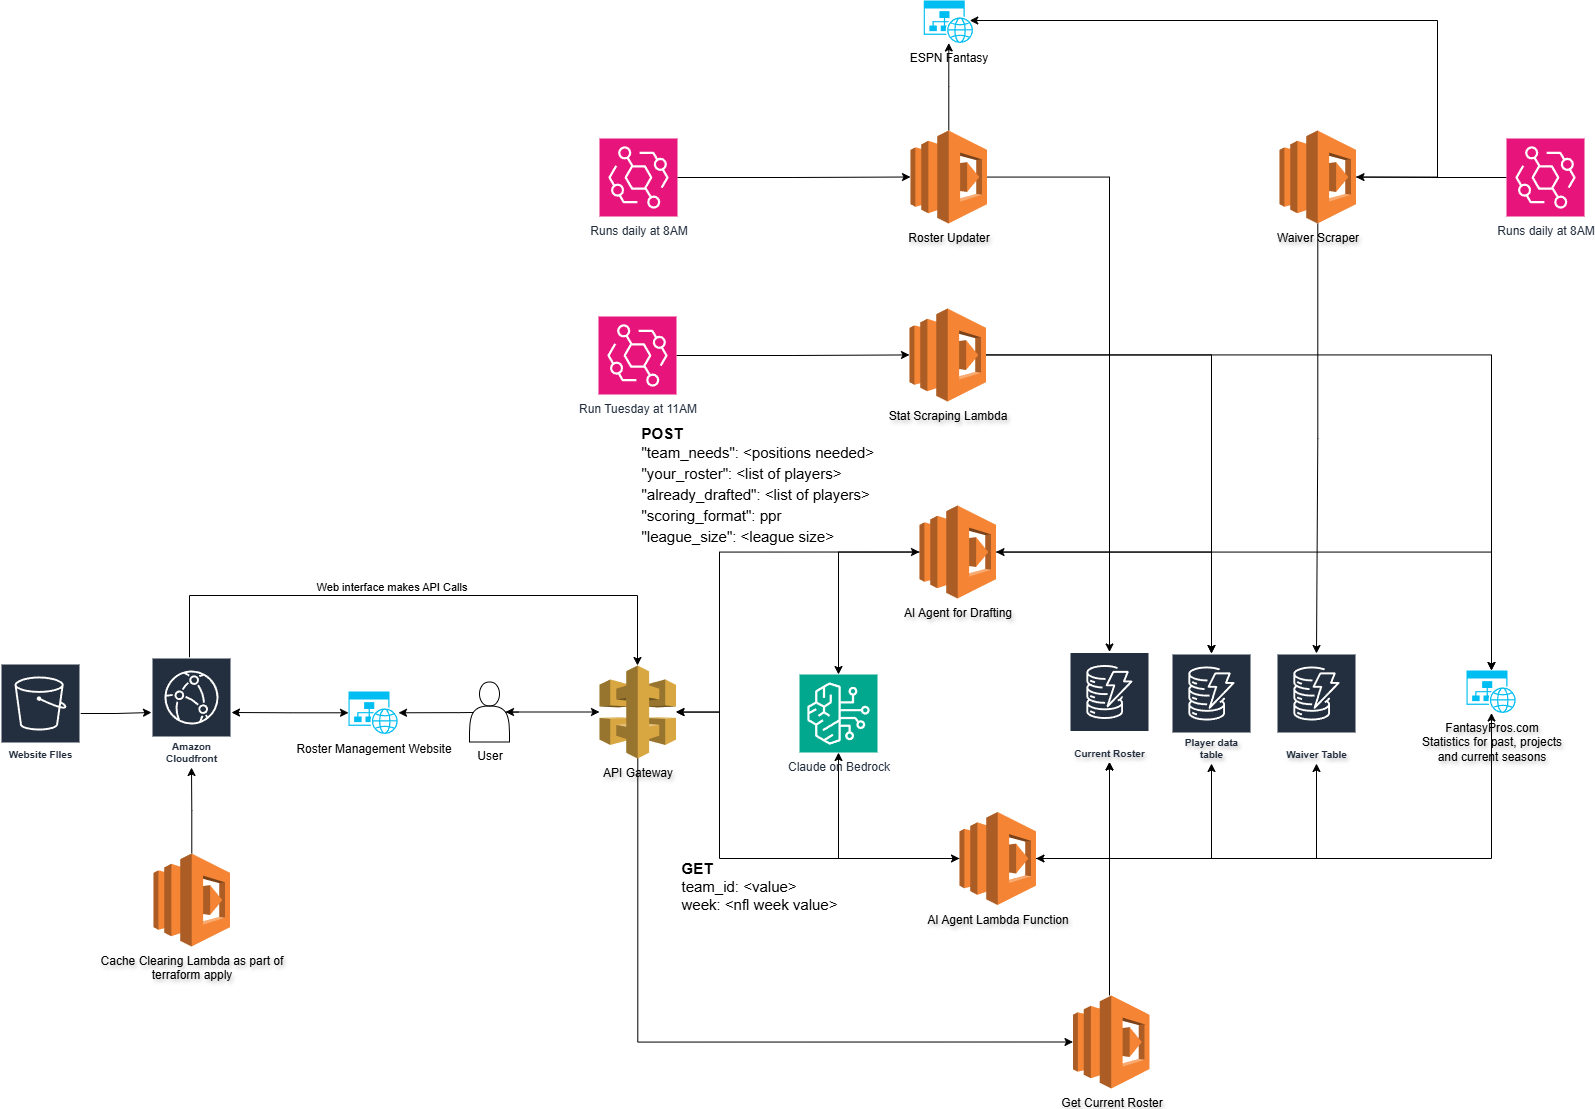
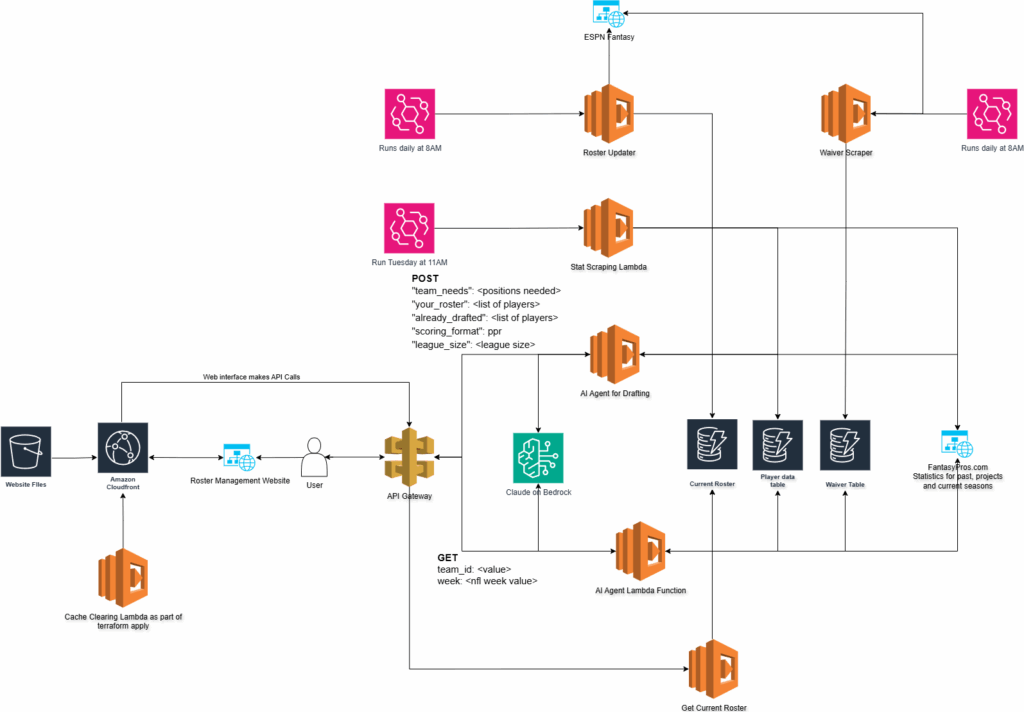
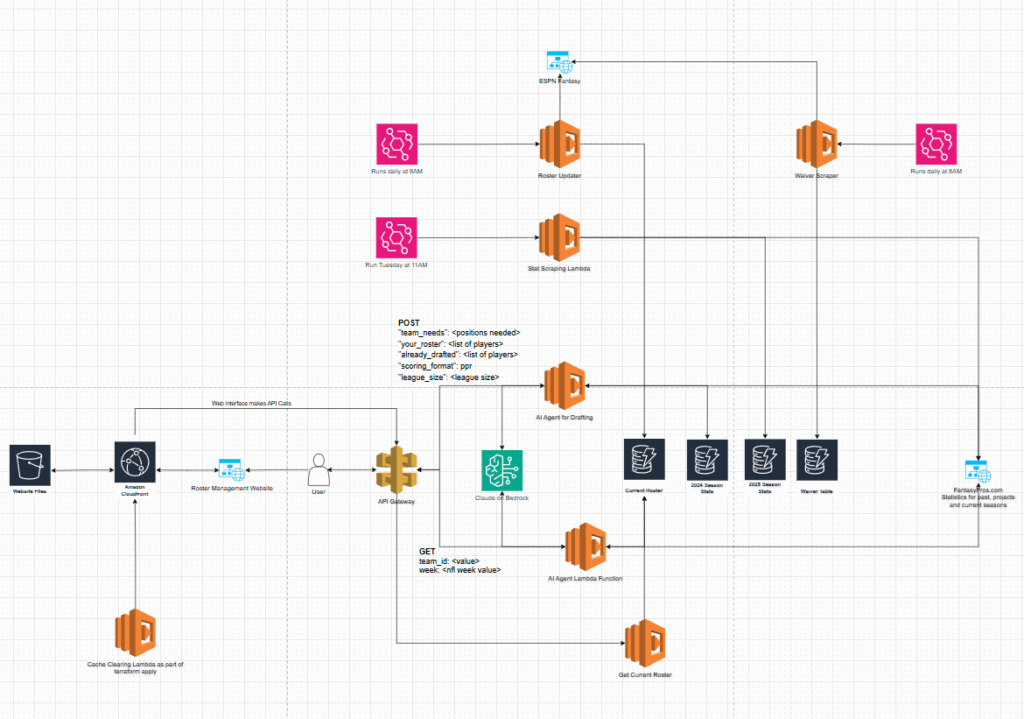
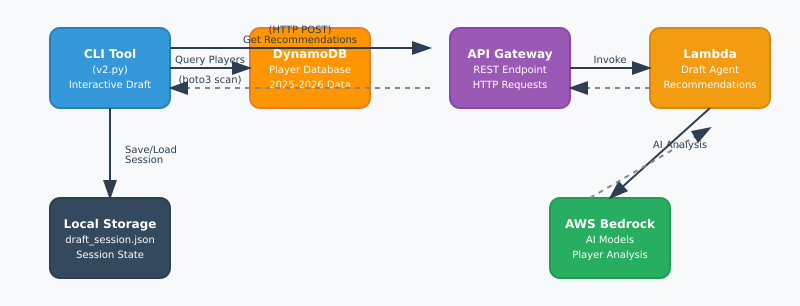
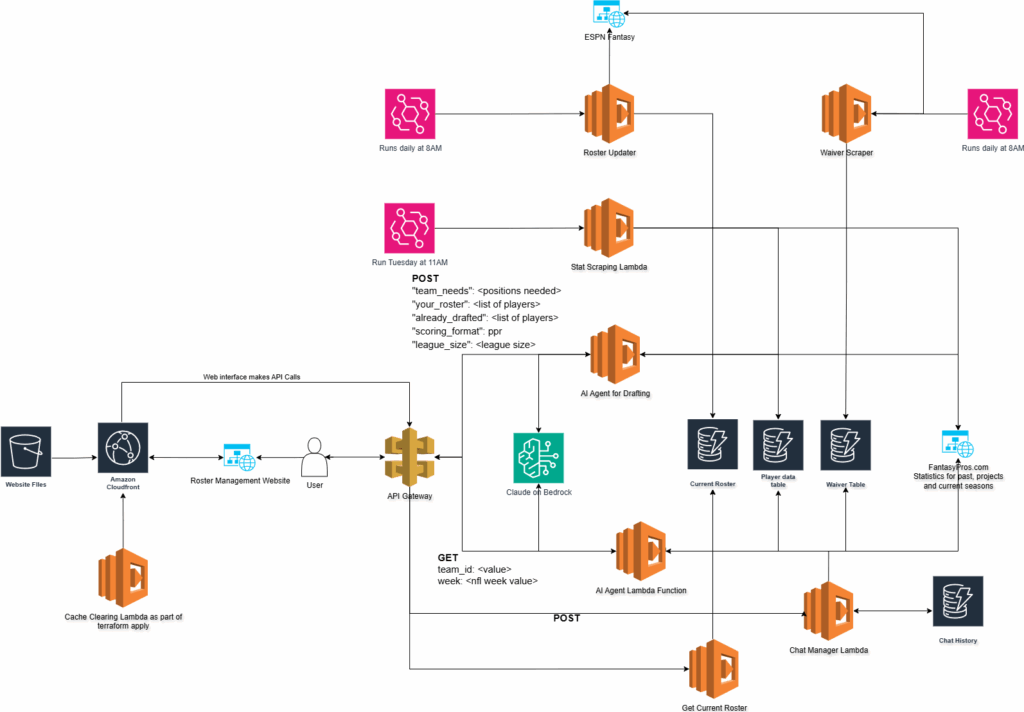
What specific position are you thinking about upgrading, or you want me to take a look at some waiver wire options?And here is an architecture diagram update to include the chat elements:
So, I’ll be back tomorrow with a new lineup. Hopefully week three treats us better!