Straight to the point. AI lost is week one matchup by 2.28 points. I watched as many of the games as I could so that I could give a slight bit of commentary.
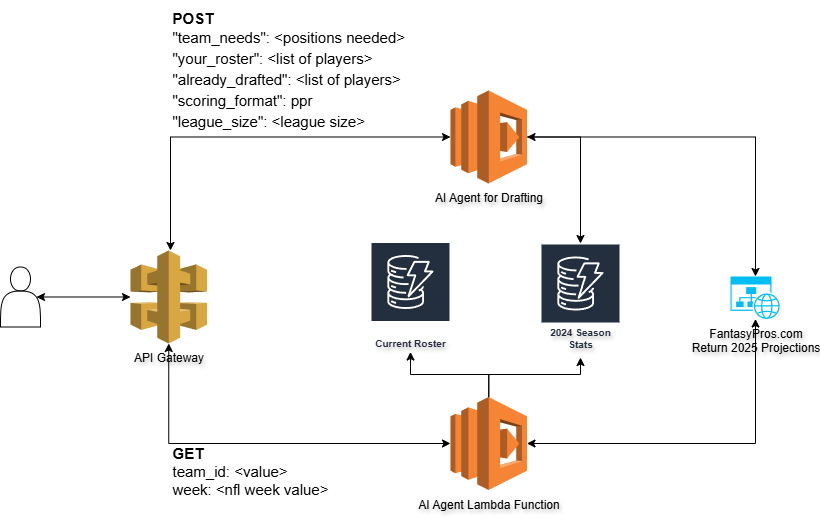
First a re-cap. If you haven’t been following along, I have built and am continuing to improve upon an Agentic AI solution for drafting and managing a Fantasy Football team for the 2025 season. The team is entirely AI selected and you can see its predictions for week 1 here.
There was a couple of concerns that I had looking at the lineup. Most notably Sam Darnold in the superflex (OP) position as I thought some of the other players might have break out games and boy was I right!
Here is the results from week 1
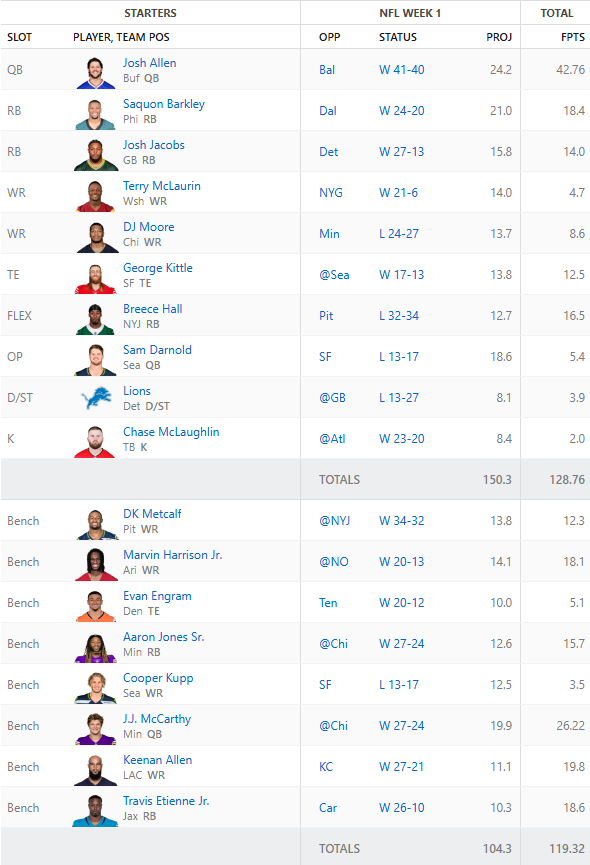
Now, let’s comment on a few things. George Kittle left his game with an injury and is likely to miss a few weeks. AI can’t predict in game injuries, yet. DJ Moore was the final hope Monday night and he was either not targeted when he was open or Caleb Williams simply didn’t throw a good ball. AI, can’t predict in game performance, yet.
Now, the Agent did hit on Josh Allen with his amazing performance against the Ravens. Breece Hall was also a great pick beating his projections.
What’s Next?
So we have some clear things to work out.
- Injuries – the AI Coach needs to understand that Kittle is likely out for a few weeks.
- Waivers – Now that we have an injury we need to replace a player. Engram is on the bench but is he the best tight end?
With these clear needs in mind I am actively working on building out a waiver wire monitoring tool to grab available players from the ESPN Fantasy platform. Because ESPN doesn’t have a native API this has been particularly challenging. I added in a Lambda function that will run daily and update the other teams rosters in a DynamoDB table so that we could potentially compare lists of players from other sources. This would give us a subset of “available” players. I also will be adding in an injury parameter that will help assist the Agent in determining the next lineup. Finally, I am scraping out the fantasy points earned per team and storing them as another data set that the Agent can use to help make predictions.
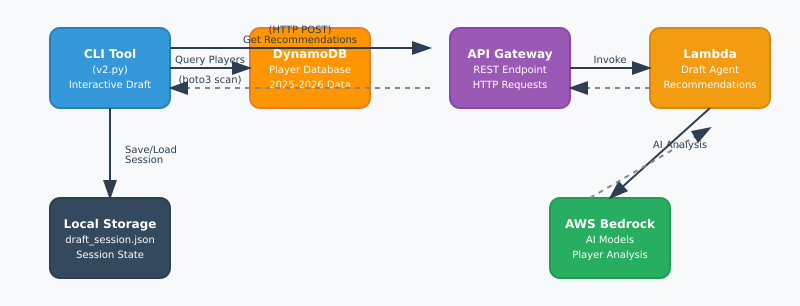
Current architecture diagram:
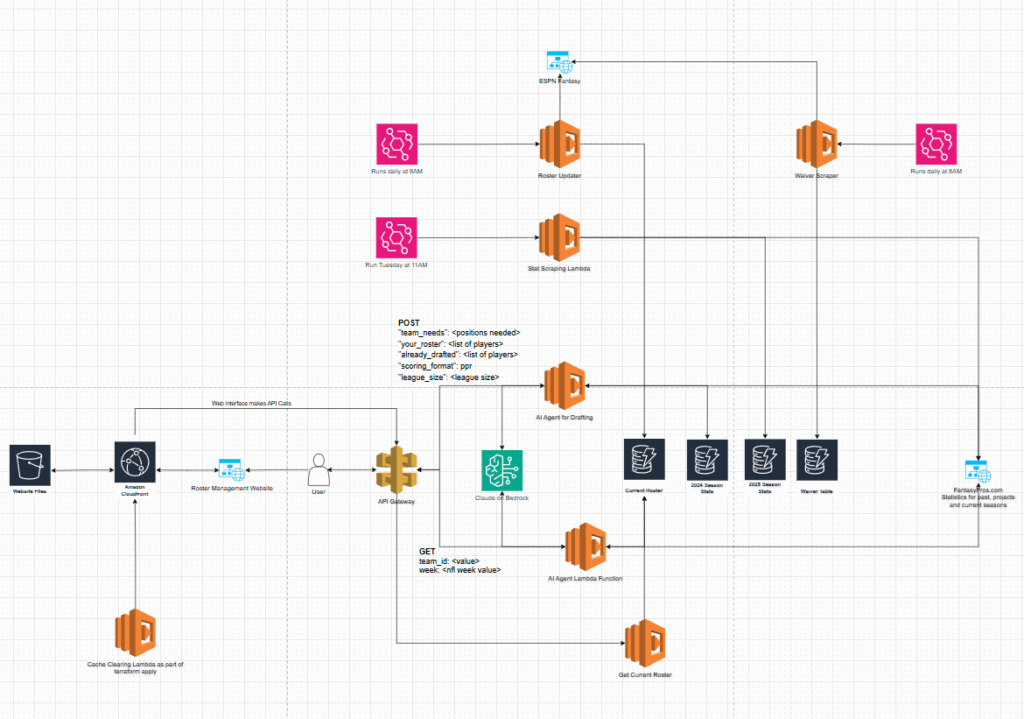
I’m also looking heavily into how I can structure all the data more efficiently so there is less infrastructure to manage. Ideally, it would be nice to have a single table with the player as the primary key and all of the subsets of data underneath.
I think the AI is close to dominating the rest of the league! I will be posting its predictions for next week sometime on Thursday before the game!