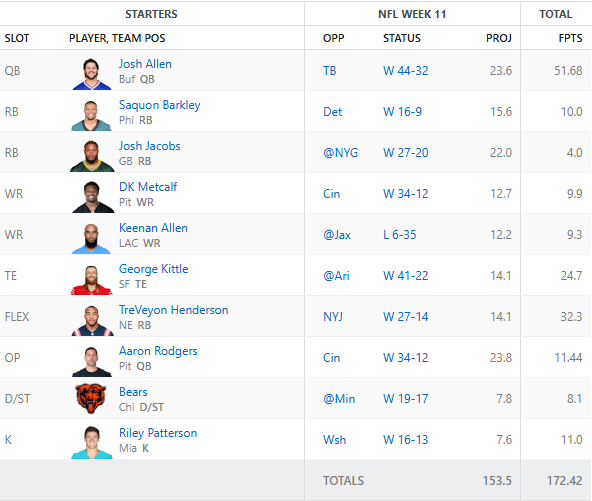
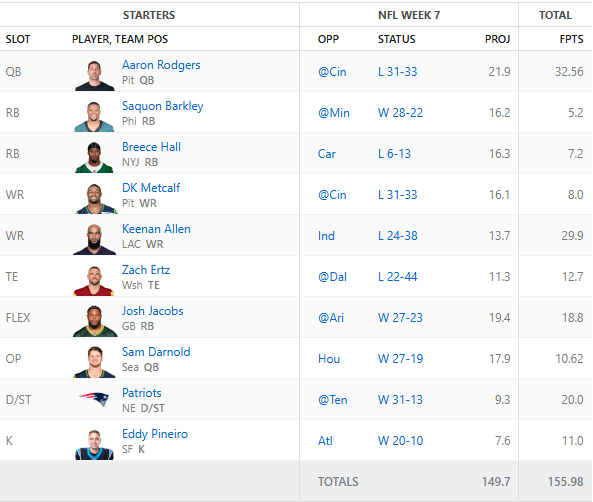
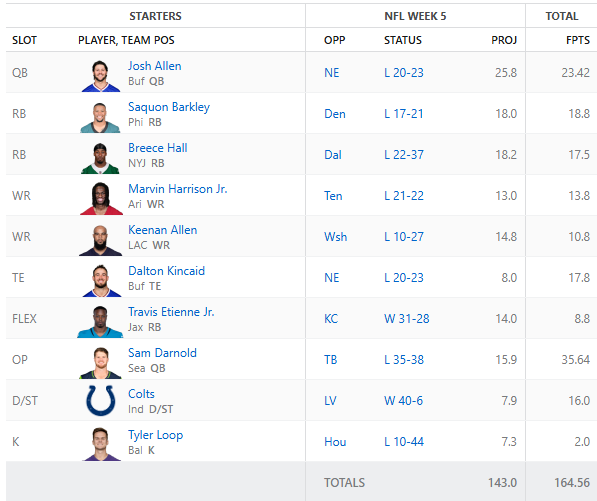
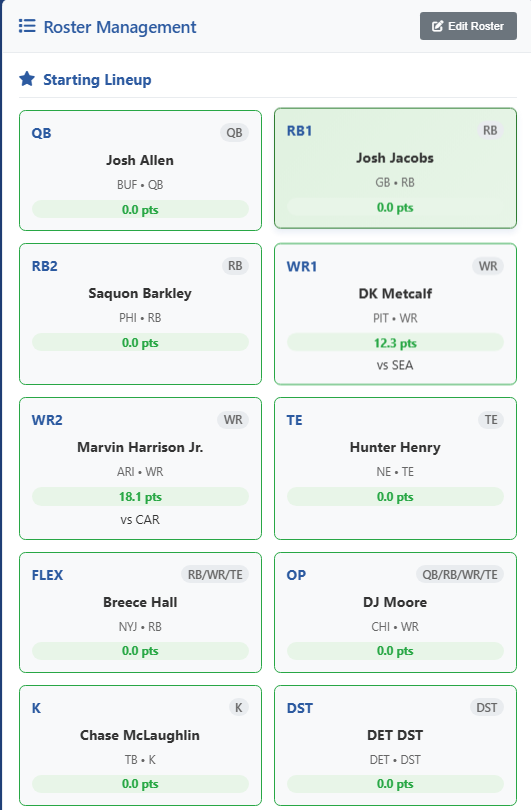
Well, unfortunately we took a big loss and are now in a three way tie for first place. Here are the actual results:
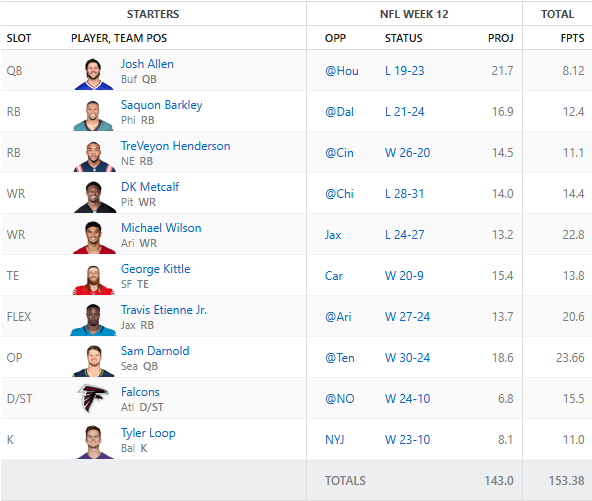
I think the biggest hit was how poorly Josh Allen played. What is interesting is that I was reviewing his passed performance against Houston and he has had his worst outings of his career there. This week was no different… The other interesting thing is that Saquon Barkley just isn’t the same back as he was last year. He is trending down.
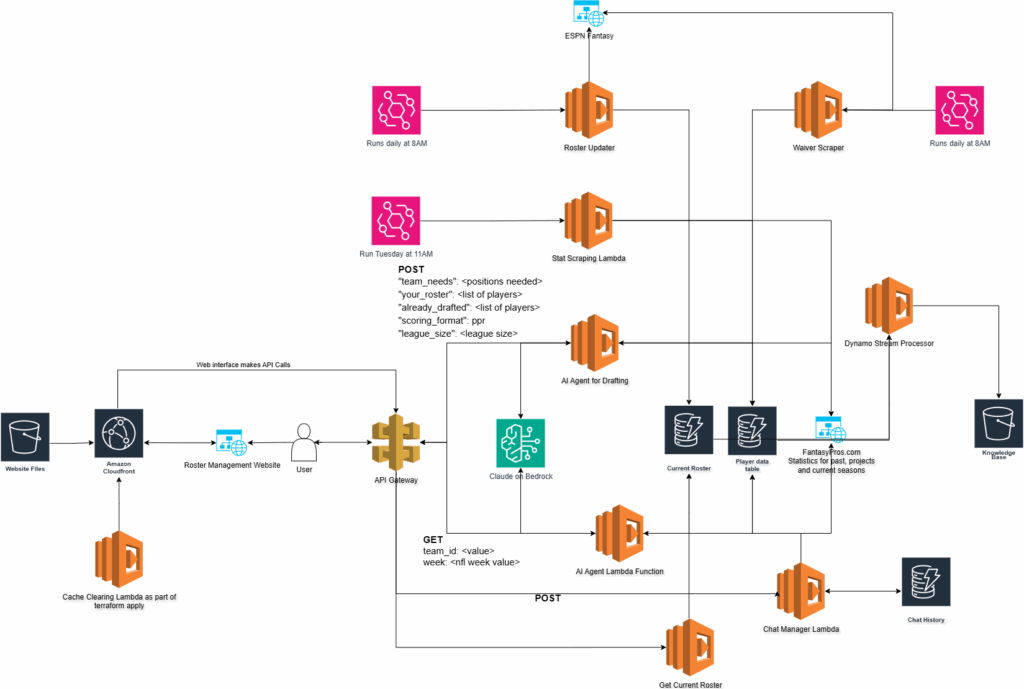
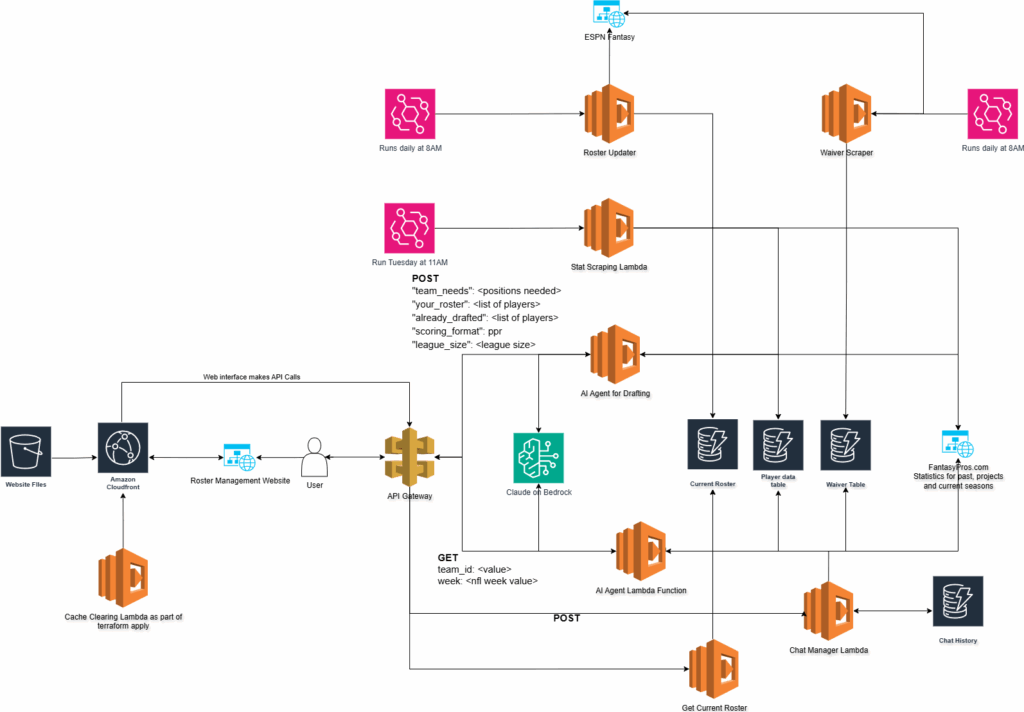
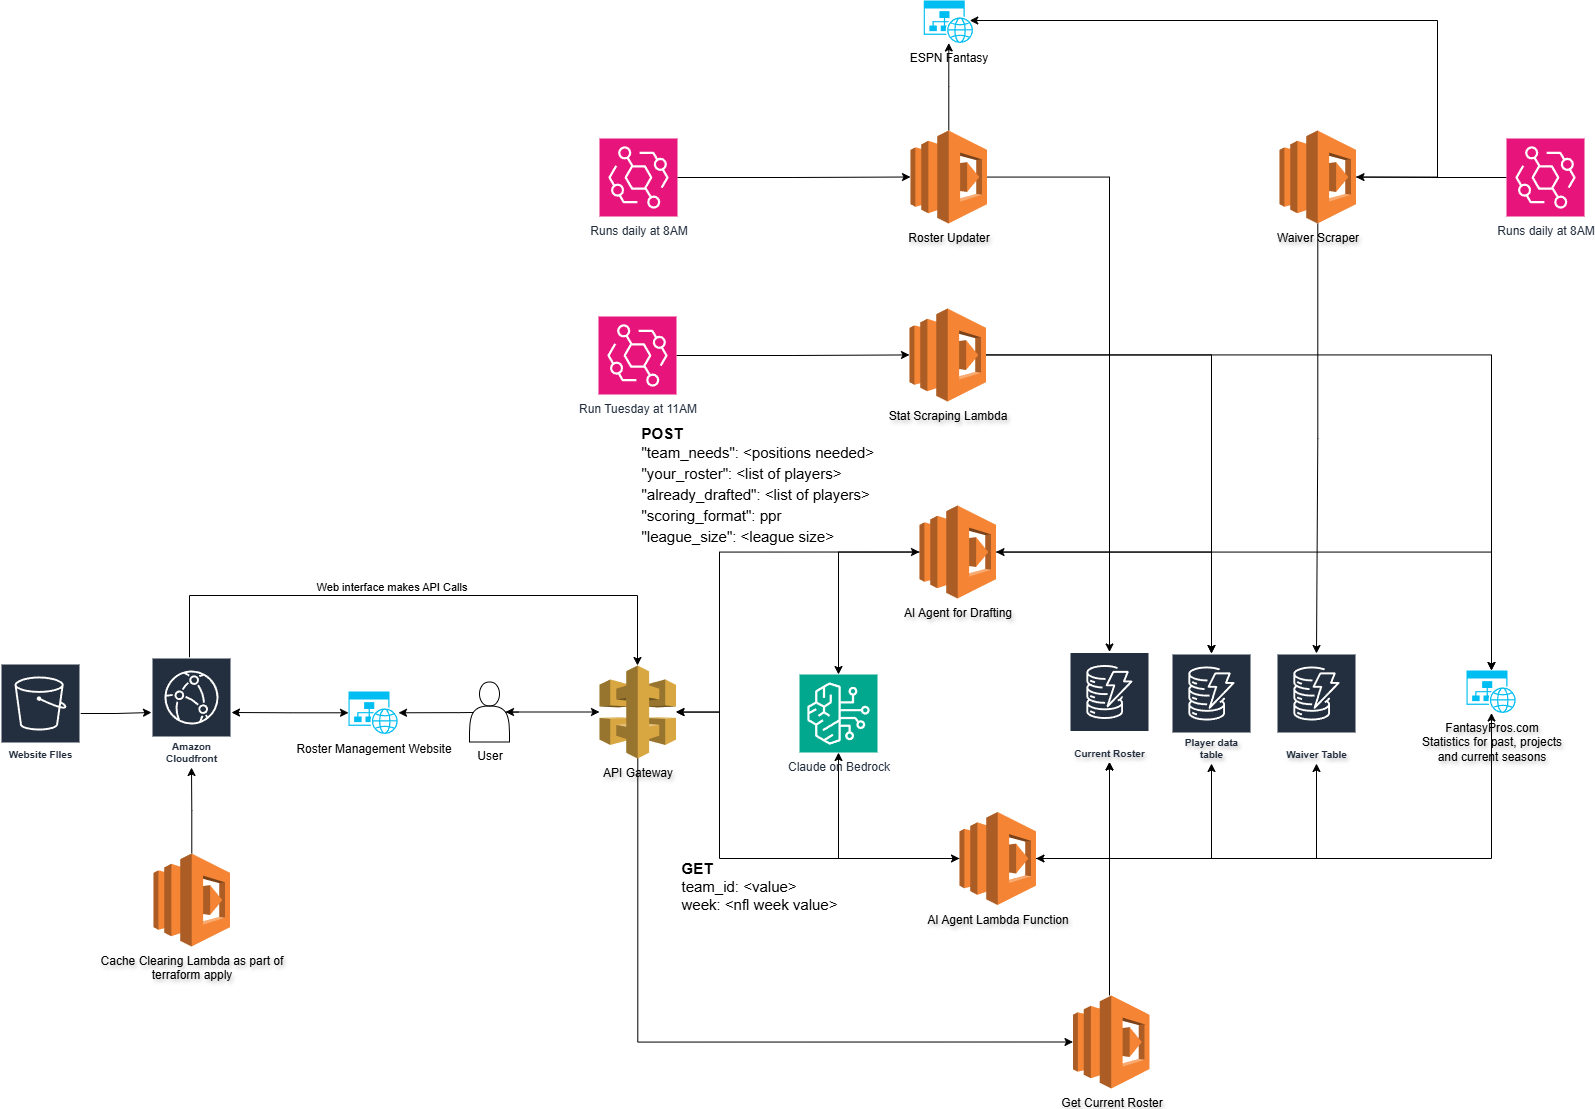
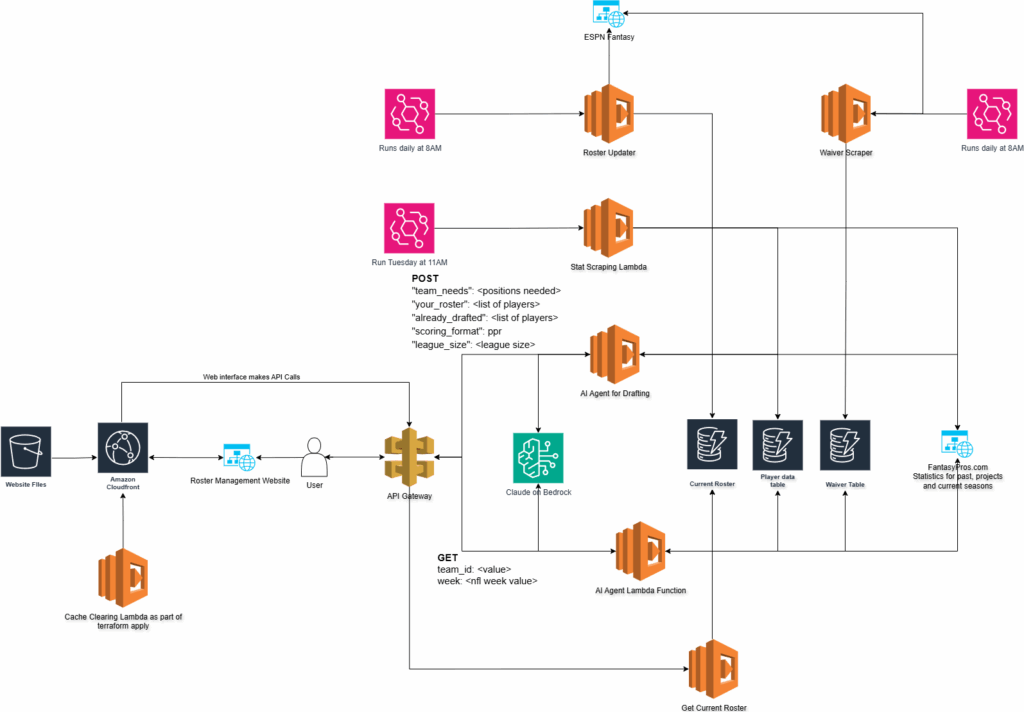
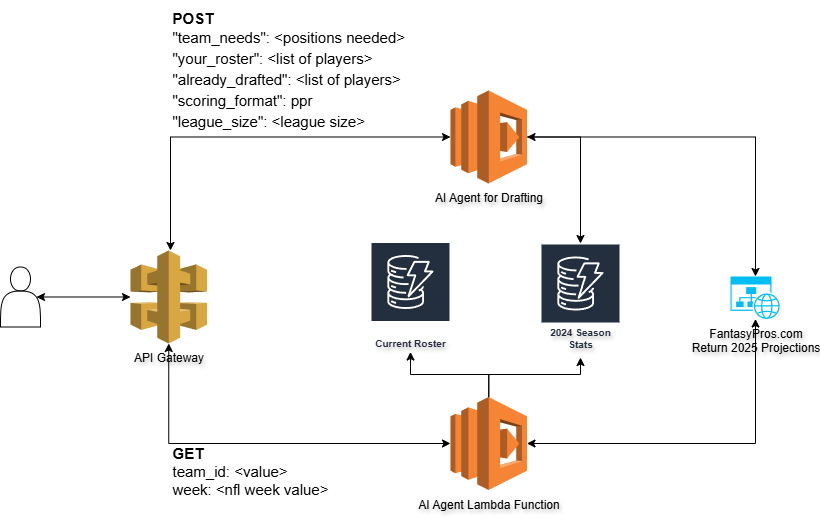
In response to Josh Allen’s poor outing I added a deviation and historical performance analysis against and opponent to the data set so now we have a value like:
"HOU": {
   "avg_actual": 11.6,
   "avg_deviation": -2.67,
   "avg_deviation_percentage": -18.69,
   "avg_projected": 14.27,
   "by_season": {
    "2024": {
     "avg_actual": 14.6,
     "avg_deviation": 0,
     "avg_deviation_percentage": 0,
     "avg_projected": 0,
     "games_played": 1,
     "games_with_projections": 0
    },
    "2025": {
     "avg_actual": 5.05,
     "avg_deviation": -5.65,
     "avg_deviation_percentage": -52.8,
     "avg_projected": 10.7,
     "games_played": 2,
     "total_actual": 10.1,
     "total_projected": 21.4
    }
   },
I then coded a new tool inside of the AI to reference this data set to assist with its final calculations.
So, when we ask the tool about Josh Allen’s performance against a team we get something like:
Found exactly what you're looking for in Josh Allen's performance data.

Josh Allen vs Kansas City (Week 9, 2025):
- 28.8 fantasy points - That's a STRONG performance!
- He was projected for 22.0 points but exceeded by 6.8 points (+30.9%)
- This was one of his better games this season

Historical Context (2024 vs KC):
- Week 11, 2024: 24.0 fantasy points vs Kansas City

Bottom Line: Josh Allen has performed WELL against Kansas City in recent matchups. In their two most recent meetings:
- 2025 (Week 9): 28.8 points
- 2024 (Week 11): 24.0 points

That's an average of 26.4 fantasy points against KC - well above his season average. Allen seems to rise to the occasion against elite competition like Kansas City. The Chiefs' defense can be vulnerable to mobile QBs who can extend plays, and Allen's dual-threat ability has historically given them problems.

The takeaway: When Allen faces KC, he typically delivers QB1 numbers. That 28.8-point performance this season shows he can still light up even the defending champs!
I need to backload some more historical data yet but that is a problem for a different day. Looking forward, I hope to build my own model based on this data and setup an automated workflow that will include data ingestion and automated model building so that I can consistently build predictions.
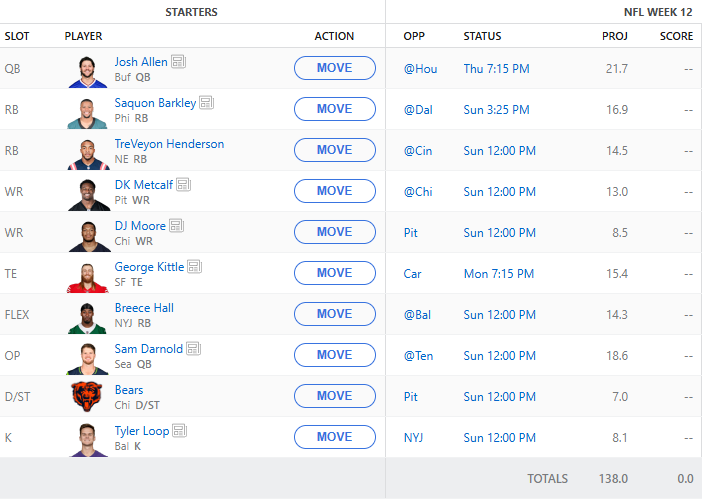
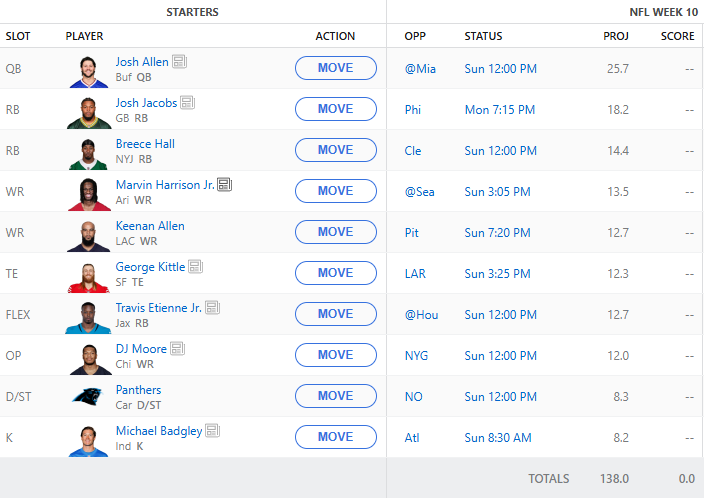
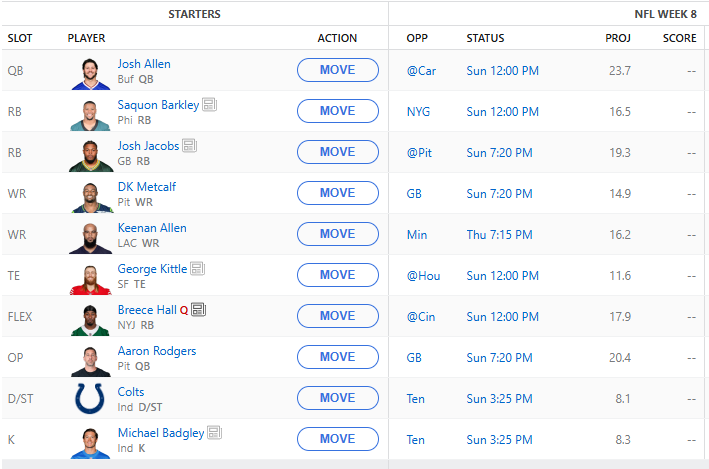
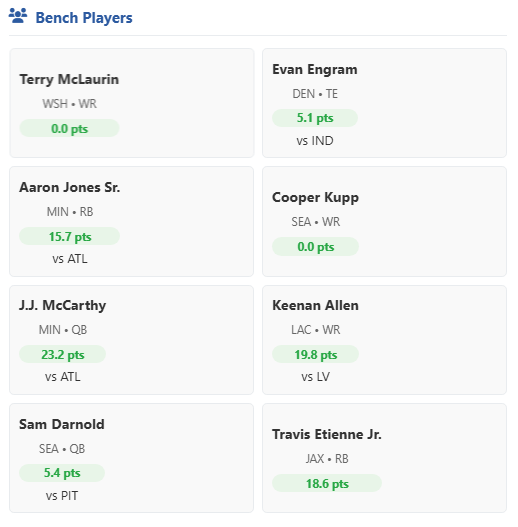
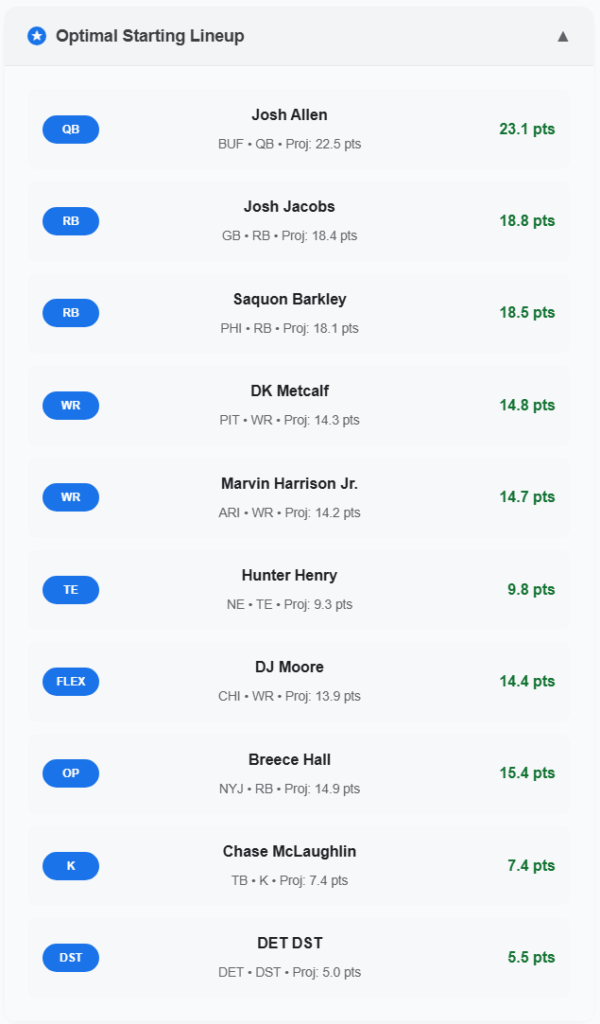
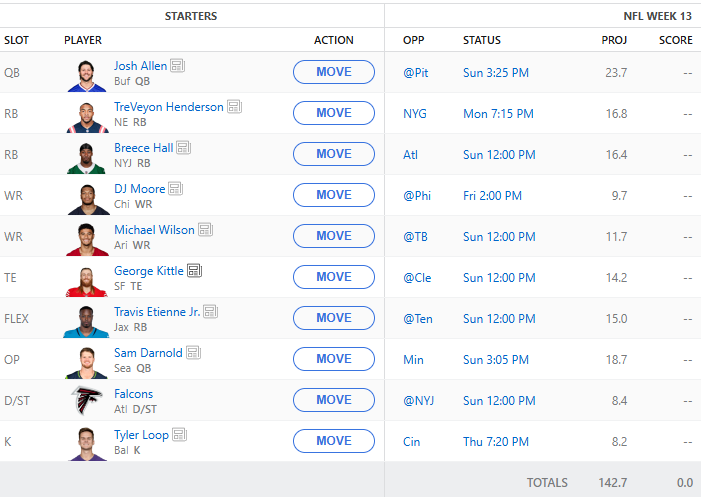
So, on to week 13. We have a bunch of injuries this week to contend with so this lineup will likely be changing once people are reporting. Here is the current lineup:
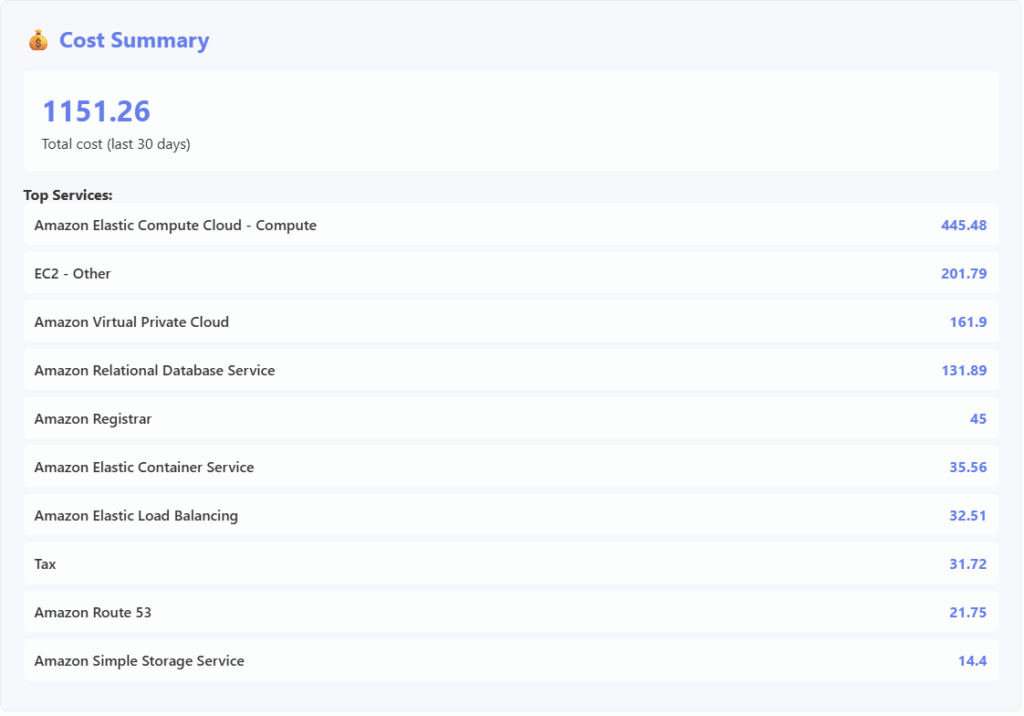
In other news I built and launched https://gridirondata.com which is an API to reference all of the data I have collected so far.
Unfortunately, its not free. But if you message me about it I’ll probably hook you up!